Next Passion
Info on building of the next Passion
Another day and another hole in the hull. This time it was for the P bracket that holds the cutless bearing and supports the propeller. To locate one end of the shaft I fitted a bracket with an alignment hole to the rear end of the engine mounting template. The exit from the hull provided a second alignment position to hold the shaft in line. Then the location of the P bracket was set by the distance of the shaft from the hull at the rear of the P bracket. With the hole for the bracket formed in the hull and the bracket temporarily secured with wooden wedges I was able to measure the shaft length ready for the over long shaft to be trimmed to the final dimensions.

Engine mounting template with guide hole for the propeller shaft.

Shaft and P bracket temporarily in place for checking the shaft length.
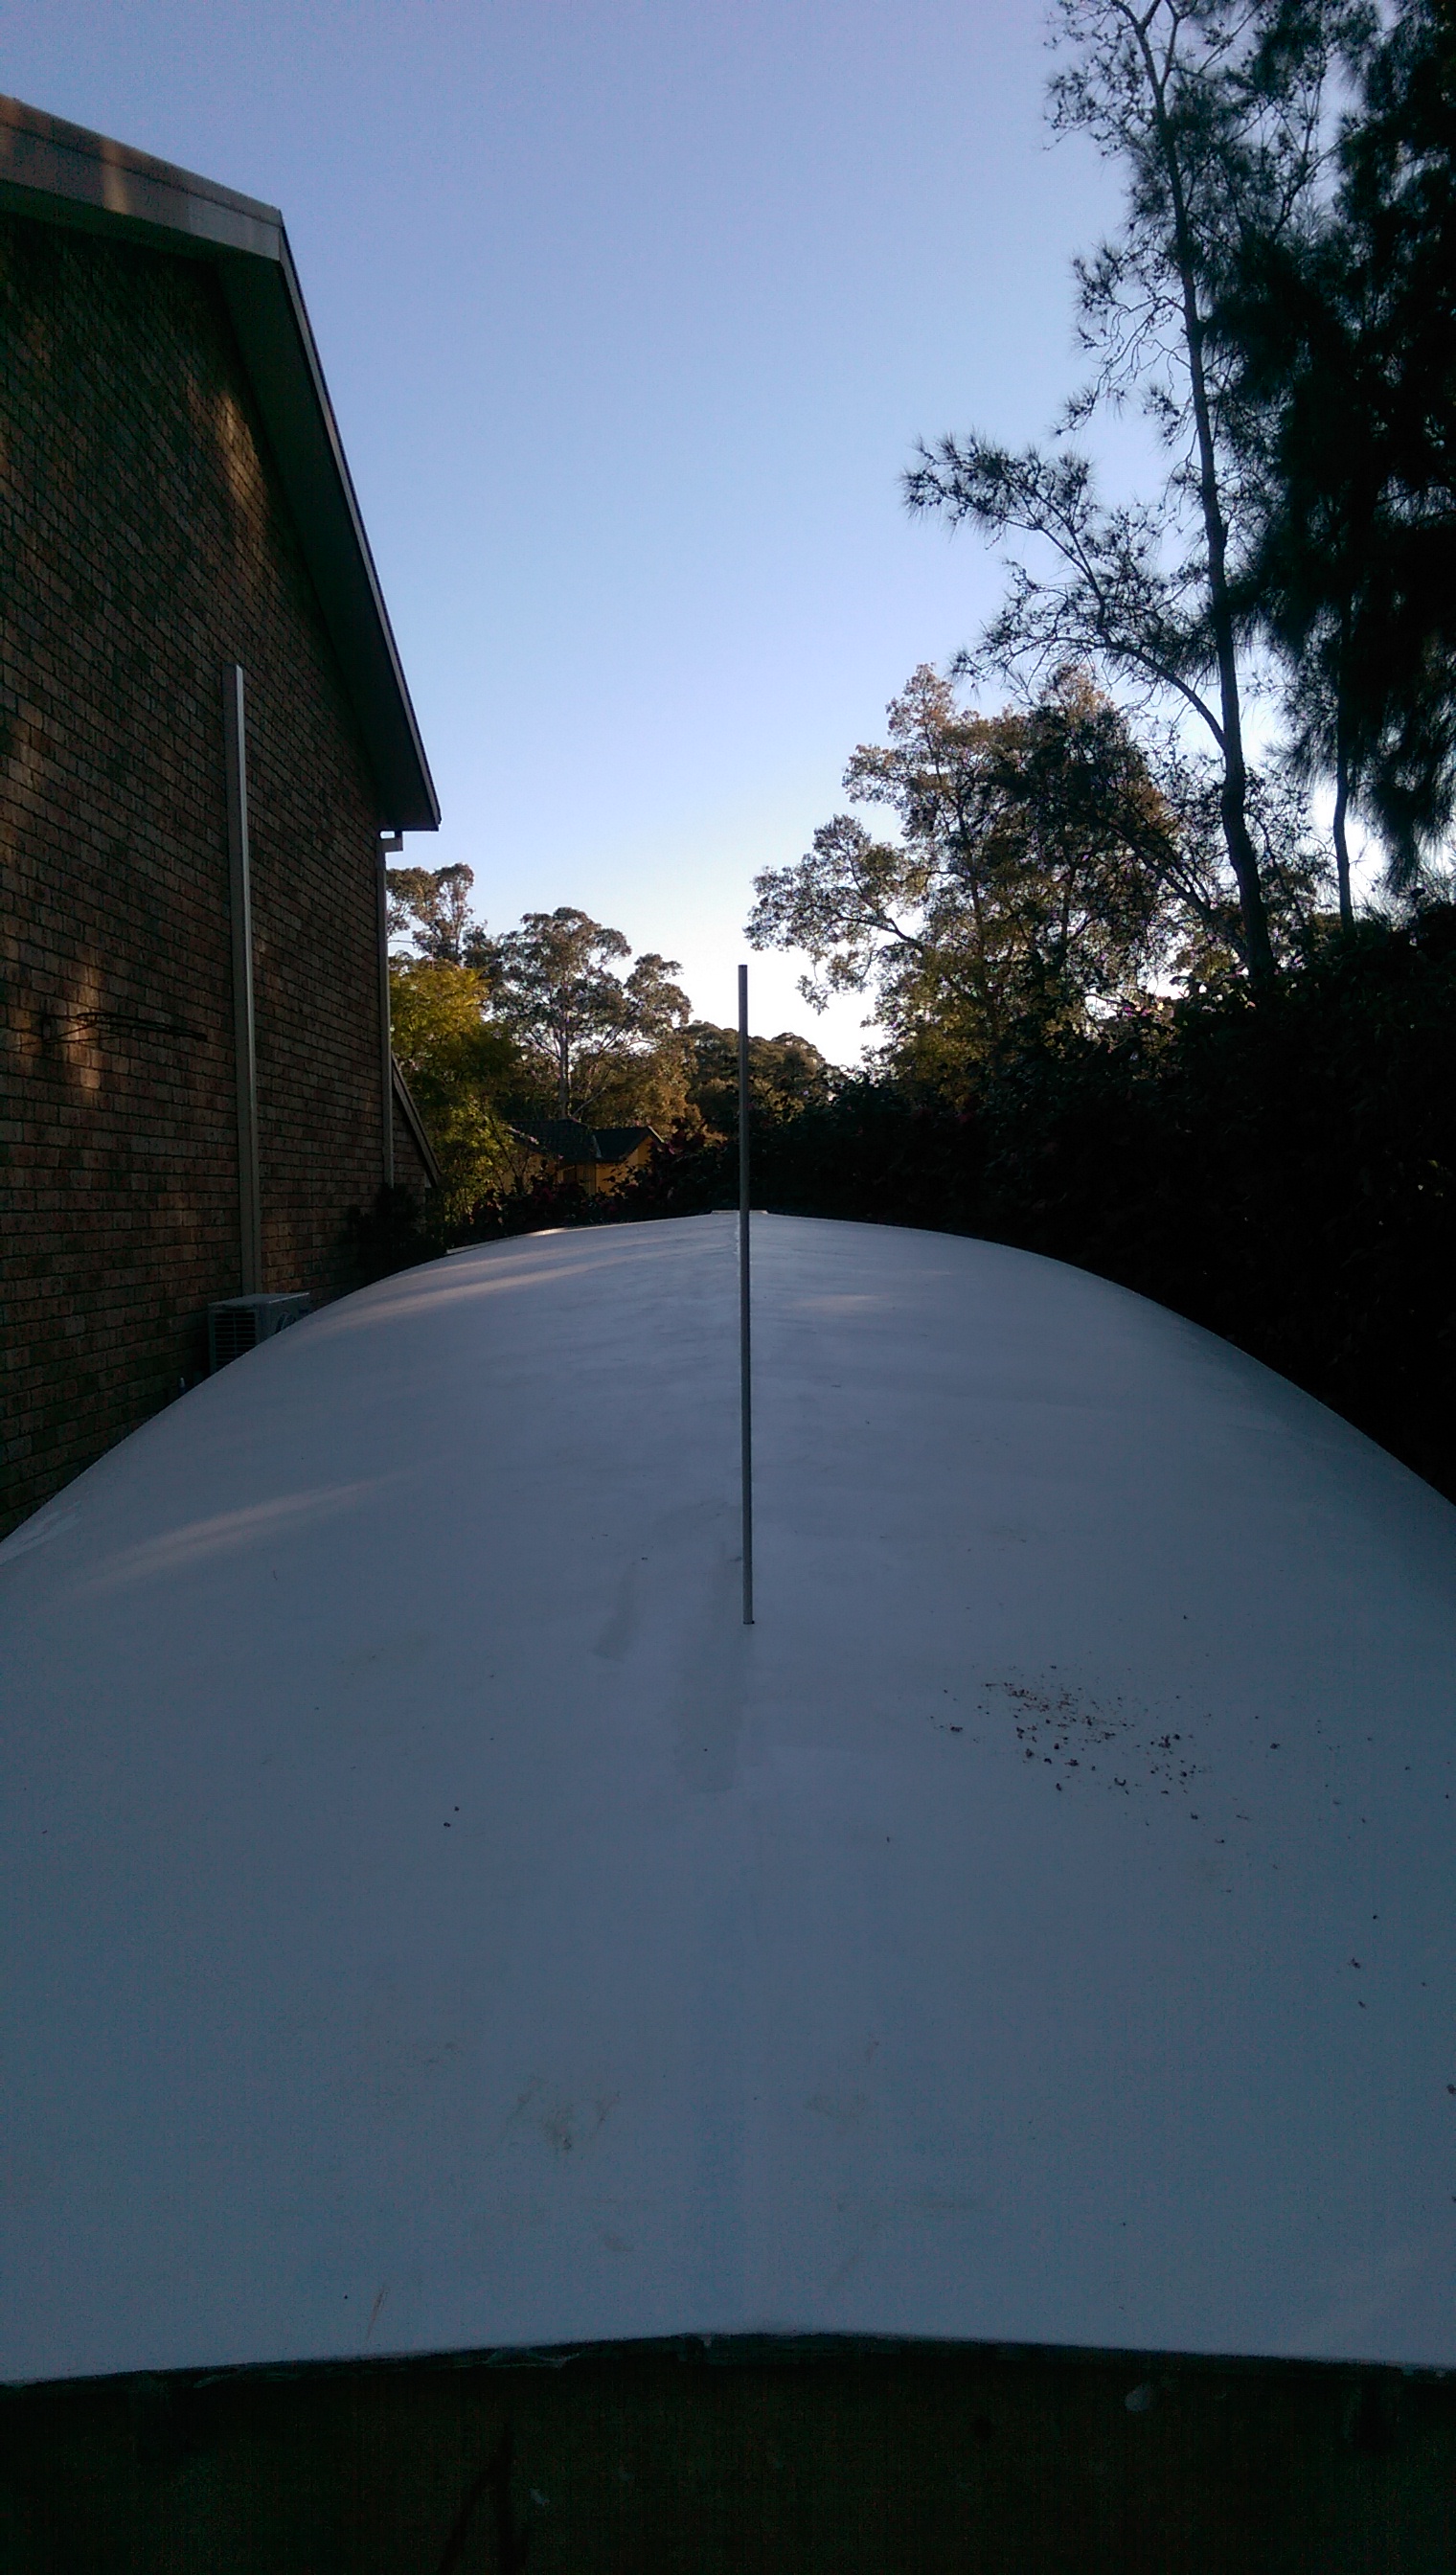
I have started to set up the prop shaft by installing the engine beds and drilling a pilot hole for the shaft. I started with an 8 mm pilot hole and now have in increased to 25 mm on the way to about 46 mm for the shaft log.

A plywood jig used to check the engine bearer alignment and establish a centre line for the shaft.

A broom handle used to get a rough alignment of the shaft. I have the shaft ready to use once the hole is large enough.

We used a long RHS welded to the surplus plate at the front to get leverage to wrap the plate around the tight curve.

A view of the bulb of our Didi 40 Cr from the stern
We have finished plating the keel delta bulb on our Didi 40 Cr. I worked with the fabricator to ensure that the plate wrapped properly around the foil shapes and the process went remarkably smoothly. it helped that we left the 3 mm plate about 300 mm over length at the front and that we welded a RHS to the front to give us leverage. The large section of surplus plate at the front ensured that the plate wrapped smoothly.
As well as the painting and fairing I have a couple of other tasks under way. After a long break I have been back working on the rudder and now have all the plywood layers of the two halves glued together ready for the stainless steel rudder stock to be glued in.

The two halves of the plywood rudder of our Didi 40 Cr ready for fitting to the rudder stock.
Before gluing in the stock in need to install the bearings in the hull as once the plywood is attached to the stock it will be too heavy to man handle around the hull. So today I used the laser level to project a vertical line from the underside of the cockpit floor to the centre of the keel. The pilot hole I drilled on the laser vertical came out exactly on the centre line “V” on the hull but for good measure I used a metal rod to check the vertical with the spirit level. Happy with the alignment I cut out the hole in the keel for the bearing to full size. Tomorrow I will do the same for the top bearing housing in the cockpit floor and then install the stock while the bearings are set in epoxy and laminated in place.
Checking the alignment of the rudder stock on our Didi 40 Cr.

Bottom rudder post bearing ready to glue into the keel of our Didi 40 Cr
The other task under way is the keel construction at a local steel fabricator. The job is progressing well now that we have made up very accurate templates from 1 mm steel plate to get a perfect shape. One side was plated in 3mm plate today. We started from the trailing edge and left the plate 300 mm overlenth so that we had some leverage to bend the plate around the tight curve at the front. We had to weld a long RHS to the plate to get the leverage required and as I pulled the plate into the base the welder tacked it in place. It looks a mighty fine job and I hope the second side goes as well tomorrow.

1 mm steel template for marking out the bulb bottom plate.

Didi 40 Cr keel bulb ready for plating with 3 mm plate.
I have two coats of primer on one side of the Didi 40 Cr and one on the other. A younger person might manage a coat a day but with the sanding between coats all I can manage is one side a day. I have a good photo that shows the progression of first one coat of Interprotect, then some spot filling, then an aggressive sand back with 60 grit paper and finally a second coat.

Priming the new Passion showing the aggressive sanding of the first coat after spot filling

Two coats of primer on the port side
The second coat requires spot filling too and then it will be sanded back with 80 grit. The third coat will be sanded back with 120 grit and by that time I hope all the spot filling will be finished. Between the second and third coats I have some International Microsurfacer on order for final fairing of the round bilge sections. That won’t arrive for a week so I might get back to some real construction. While we were away sailing in Canada the sailmaker modified an old mainsail off Passion by adding a 900 mm deep panel to the foot. It is only 4.7 metres on the foot compared to the planed 5.5 metres but it will be enough sail for cruising for Elaine and myself.

The old North mainsail off passion has been extended again. it now has 2.6 metres longer luff than the original.
Bill Bollard a retired naval architect and model maker was a regular Laser sailor at Gosford Sailing club until two seasons ago. Bill regularly assists the Lasers with a start boat, one he designed and build from molded ply and today he was again helping for the first August pre season race at Gosford. Bill and I regularly talk boat building and he has been interested in my current project the Dudley Dix Didi 40 Cr. He has very kindly produced a half model of the yacht which he presented to me after today’s Laser race. It is a lovely model and a very special gift which I will cherish.
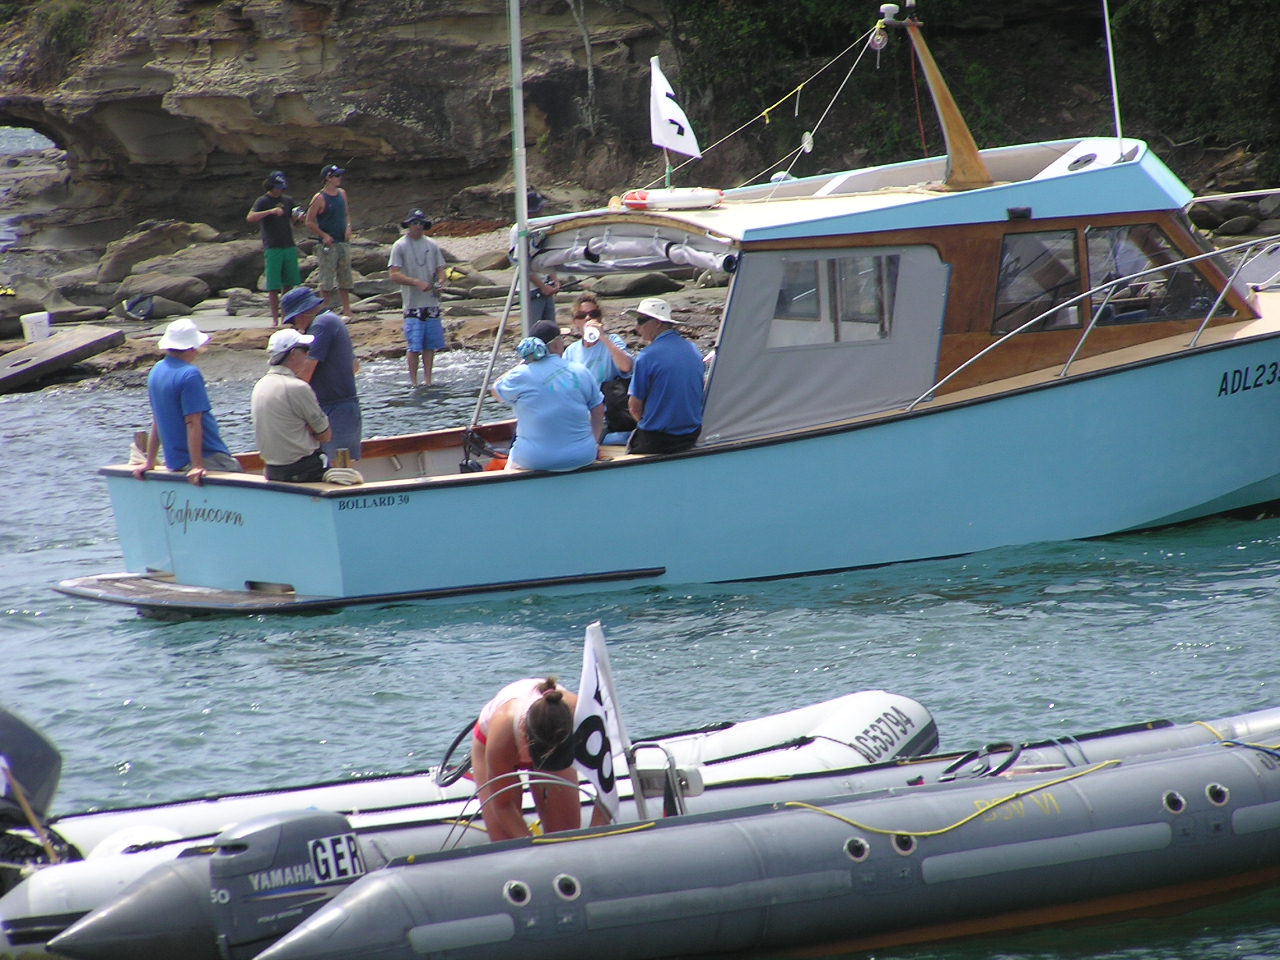
A photo of Bill’s boat taken at the Laser Worlds at Terrigal in the 07 08 season.

Half model of our Didi 40 Cr built by Bill Bollard

The Didi 40 Cr hull glassed and sanded with some fairing in progress

A front view of the Didi 40 Cr hull glassed and sanded.
We have been away in Canada and the USA for sailing in the World Laser Masters regatta with two fellow crew from Passion. We enjoyed the sailing and the wives enjoyed the touring so it was win win. Prior to departure we had some very wet weather and as soon as the Sun came out I caught a winter bug so in all I have had a six week break from boat building and need to make up some time. We landed back in Sydney on Saturday morning after a long flight from New York but by the afternoon I was back sanding down the fibreglass on the hull. I can recommend working in the Sun as a good cure for jet lag. After two more half days of sanding I have spent the afternoon with my long fairing battens checking for any hollows and am happy with the finish. There is still some glass weave to fill before the painting starts but I can see the light at the end of the tunnel.
The unseasonally warm weather has been ideal for glassing the hull of our Didi 40 Cr. As of this evening just over half of the hull is covered with 425 gram double bias glass and two or three fine days should see the task finished.
I am mixing enough resin for a resin to glass ratio of 1.67 and generally have a tiny amount of resin over. The glass content is 37% and with these properties the thickness should be 0.75 mm. With this amount of resin I can completely wet out the glass and the laminate should provide both structural strength and water proofing for the plywood for years to come.

Just over half of the hull of our Didi 40 Cr is now covered in 425 gram double bias glass in West system epoxy resin
Today I put the first section of the 425 gram double bias glass cloth on the exterior of our Didi 40 Cr. It seems a long process to get to this stage from the initial fairing some many weeks ago. All the finishing steps like fitting the stem, adding the 2 mm of glass in the keel floor area under the keel shoe, fitting and shaping the keel shoe, drilling the keel bolt holes, planing the ‘V’ of the bottom and adding back the 9 mm ply layer and then shaping that back to the ‘V’ all takes time. As well I left the glass reinforcement of the exterior side of the butt joins in the plywood to the last so that there would be a good chemical bond as well as physical bond to the overlying glass.
Today’s task was the last layer of glass over the keel shoe, and glassing the last two butt joins. After a break for a late morning coffee it was back to final fairing of the stern section and sanding all the weathered timber from the plywood so that the glass was onto a clean sanded surface.
Next task was to make sure the new ‘V’ on the bottom was exactly on the centre line and straight and that needed some fine adjustment with a sanding board loaded up with some 36 grit abrasive. Some final torture boarding of the radius chine finished me off as far as physical activity for the day was concerned. Finally the time came for the first layer of glass. Then it was mix the epoxy and spread the epoxy then roll it out evenly with a foam roller then roll the glass onto the resin squeezing it flat with a plastic spreader as it was rolled out. This process went surprisingly well as the surface is very flat and the glass rolled onto a cardboard tube was well behaved.
Once the glass was well rolled down with the bubble pricking roller the last of the resin was rolled onto the surface and then spread again with the plastic spreader. With all the bubbles removed the peel ply was rolled out using a second cardboard tube and it went equally well. Using the plastic spreader again all the air bubbles between the peel ply and the glass were spread out an in the process the laminate smoothed out reasonably well.

A butt join grooved ready for the reinforcing glass

A butt join with 1.2 kg of glass per m2 across the join and covered in peel ply

A butt join across the bottom of the hull with continuous glass from radius chine to radius chine
The hardwood shoe which fits between the hull and the steel keel is fitted to the hull. It sits on top of a 2 mm thick layer of high strength epoxy glass which is part of the additional reinforcement I have included in the construction of our Didi 40 CR. I had already drilled pilot holes for the keel bolts but I checked and rechecked every part of the way as I drilled the full size 25 mm holes through the keel and keel support frames.

Checking the keel bolt hole alignment before gluing the hardwood shoe to the hull.
It took the best part of a day and a half to drill the eight holes, fasten the hardwood shoe down with two of the keel bolts and prepare the plywood capping for the centre line reinforcement. The photo shows the two keel bolts temporarily holding the keel shoe until the glue dries. The bolt have been wound around with packaging tape so that they come out to the full diameter of the holes and there is no movement of the shoe while glue sets. The packaging tape is also excellent mould release material and the bolts should be able to be removed even if some epoxy had oozed onto the tape.

The keel shoe glued in place on top of the large area of mm thick glass reinforcement

One of the keel bolts temporarily holding the keel shoe while the glue cures.
The plywood capping pieces have to be shaped around the keel and also splice joined along the length so it took a couple of hours to do that effectively. Tomorrow the plywood will be glued down ready for the final shaping back to the original hull “V”. Also completed is the reinforcement where the 70 mm diameter stainless steel rudder shaft goes through the backbone. Two pieces of spotted gum hardwood have been glued in either side of the backbone making a very solid structure to support the loads on the rudder shaft.

Two 75 by 30 hardwood doublers reinforce the backbone where the rudder post will exit
I have had a very lucky day with the weather and managed to lay up most of the glass reinforcement on the bottom ply that supports the keel loads. The reinforcement is 2 mm of high strength epoxy glass which I have taken out to the position of the water tank sides which support the keel frames. Length ways it extends for three metres from the mast step to the end of the engine beds. The layers are stepped so that there is not an abrupt change of 2 mm in the skin shape. Peel ply over the edges of the glass ensure that the edges are held flat and there will be minimal clean up once the peel ply is removed.
The area for the glass reinforcement includes two butt joins where I have planed out a step to allow an extra heavy layer of glass to reinforce the join. All up the join is covered by 2.75 mm of glass so it is far stronger than needed. The photo shows the butt joins prepared for the heavy glass strap and the ply hull sanded down ready for the glass reinforcement.

On the luck with the weather story Monday was very frustrating as every time I removed the covers to start glassing the drizzle would start so the day was spend running errands and epoxy saturating the inside of the hull. The forecast for Tuesday was no better and heavy showers were forecast for 1:00 pm in West Pennant Hills. Hoping to beat the rain I started early and laid up a couple of layers of glass then covered the boat waiting for the rain. Over morning coffee the sky lightened so I tackled the next section successfully. The final bit of risk taking was to gamble that the rain showing on the rain radar would go just south of West Pennant Hills. The last section I glassed was the final three layers of glass on the front half of the keel area. I had just finished spreading the resin on the three layers when a few spits of rain started. I quickly covered the resin with peel ply and had enough time to remove all the air bubbles, smooth out the glass under the peel ply and pull the covers back over before any serious rain started.
The two meranti capping pieces have been glued and screwed to the stem post on the new Didi 40 Cr and the last two small sections of ply have been screwed and glued so the front end is looking more complete. Behind the butt join of the plywood along the gunwhale at the stem I have crafted backing pieces of 12 mm ply with parallel 45 degree bevels. One bevel sits on the angled gunwale timber while the other makes a nice transition from the 12 mm single layer to the two 12 mm double layers. This little extra strength will come in handy if we ever attach a fixed bow prodder through the double walls of the anchor locker.

The new nose job on our Didi 40 Cr

Our Didi 40 Cr looking more finished by the day
At the stern I have joined the two bottom plywood panels that extend past the transom with a neatly angled 12 mm plywood doubler and so all the hull is complete except for the capping piece along the keel center line and the glassing. On the procurement side the keel fabricator has been selected so I have move on to the engine selection. I was delighted to learn that the new Yanmar 3YM30ae has the 125 amp alternator, up from the 80 on the 3JH4e we have on Passion. Also I have done some speed and power calculations and estimate that the new build will be a knot faster than Passion despite having a smaller motor. The fibreglass stern tube for the prop shaft is on back order so I should get the engine bearers organized so I can align the stern tube when it arrives. Still on the engine side I have managed to source a Radice shaft seal which has a water inlet built into the seal. That will allow me to put the cutless bearing right at the top of the stern tube securely centered around the frame support and have cooling and flushing water going through the top cutless bearing and out the stern tube. A the top of my current job list is doing the capping piece along the keel line and the keel hardwood landing. I have a nice piece of spotted gum for that job and while it is heavy it is very solid and will provide great crush resistance against the load of the keel bolts.
The fine weather has returned and so I am able to recommence the fairing of our Didi 40 Cr hull. When there is no breeze the belt sander does a good job of leveling the local high spots around the plywood planks on the radius chine. If the wind starts blowing in the direction of the neighbours I switch to a hand plane. A long heavy fibreglass batten and a lighter aluminium angle have proved very useful for locating high spots that need a little trimming.
As reasonable progress has been made with the initial fairing today I made up a new torture board and have been up and down the port side. There is still a little to do on the port side but it is starting to look pretty fair. I tried spreading blue chalk on the hull and sanding it away with the torture board and that seems like a pretty useful technique except is is probably too exacting for this stage as we have yet to glass the hull and then will need to do it all again.

Initial fairing on the starboard side

Port side fairing showing the heavy fibreglass batten used for checking for high spots
Many weeks have passed since any meaningful progress has been made on the new Passion, my Didi 40 Cr. The planned breaks to sail the old Passion at Port Stephens and to visit relatives in Perth have been extended by the prolonged wild and wet weather in Sydney. Boat building planned for the intervening periods was difficult and even the inside jobs were hampered. On returning from Perth we had to bring Passion back from Port Stephens and were fortunate to do so on two of the four dry days since the rains commenced. Most of the stranded fleet made it back in the previous two day window and one adventurous pair even managed to finish their return voyage with a race in the GFS Saturday series which they won.

A dry sunset on the return voyage from Port Stephens
Since we returned last Thursday there has been more heavy rain so work has been restricted to what can be done in the garage and procurement of fittings. The rudder is fabricated from nine layers of plywood and seven of these have been cut to profile ready for joining. The central 12 mm panel is surrounded by the 70 mm rudder stock and 12 mm stainless steel tangs which provide the turning moment for the structure. There are just two more small 6 mm panels to be cut to complete the set but the joining to the stock must wait until the rudder bearings are fitted to the hull in the next dry spell.

Cetral 12 mm plywood panel of the rudder surrounding the rudder stock
The weather is forecast to be dry and sunny for the next six days so hopefully the covers can come off and the fairing continued where we left off a month ago.
Good Friday was a typical wet Easter day in Sydney but ideal for a church service and visit to children and grandchildren. Saturday was little better but under the inverted hull I found some useful tasks to finish while waiting for children and grandchildren to visit for the weekend.
After a few practice sessions the filleting of the frames to the hull is progressing well and best done in accordance with the Gougeon Brothers instructions. It would be faster if I had a disposable cartridge to place with a gun but I am managing without although it means cleaning up a bit more filler after smoothing it into the corners with a Magnum paddle pop stick.
I am also practicing fairing the transitions between fibreglass reinforced corners and plain plywood by fairing the join with thickened epoxy. In between tasks I have done a little more routering of stringers and sanding of plywood ready for the next coat of paint in the quarter berth.
Easter Sunday would have been a great day for boat building but church, family and friends took priority. The presence of the family was a great excuse to pull back the tarpaulins to show the progress since their last visit and later in the day to sneak out to the boat and take out a hundred temporary screws ready for filling and fairing.
While the covers were off I took a photo showing the results of just one day of filling and light fairing on the front of the starboard side.

Our Didi 40 Cr after just a day of hole filling and light fairing is already starting to look good.