Next Passion
Info on building of the next Passion
On Wednesday I took a chance against the forecast and glued on the last 12 mm panel on the transom below the boarding platform. For good measure I sealed the ply edges with thickened epoxy to keep out any moisture overnight. Today I trimmed the surplus ply on the underside again epoxy saturated the edges and face of the ply with wet on wet coats of fast cure part B. The cure beat the thunderstorm that rolled through late in the afternoon.
I managed a coat of epoxy primer in the locker and have just one small section behind the quarter berth to sand and prime. It is already double coated with epoxy and the white primer is to improve the light in the dark corners of the hull.
In between jobs I bogged some 100 mm wide 12 mm ply strips to the top of the frames I am building to support the hull after the turn. Tomorrow I will add a couple of layers of glass for good measure and then pre drill the frame ready to bolt to some solid LVL planks.
Two support frames of 24 mm ply shaped to the hull and with 100 mm wide ply planks to spread the load.

The last panel of 12 mm ply glued to the transom of our Didi 40 Cr. It is faired on the underside and saturated with epoxy resin.

A closer look at the stern support for our Didi 40 Cr. I must remember to drill the hole in the frame for the prop shaft
What a difference a day makes. Contrary to forecast the day was perfect for boat building and gluing in particular. I was still thinking of my friend Bruce who was retrieved intact from the briney last weekend and the importance of a good boarding ladder so I added a second 12 mm ply reinforcing panel to give a total of 36 mm of plywood to screw into. Gluing conditions were so good that I was able to add this extra reinforcement and still install the boarding platform and have the glue cured before dark. With the afternoon sun streaming into the garage I was forced to share the pleasant working conditions with a lizard which would scurry away every time I returned. In the company of the lizard I managed to cut out panels of 12 mm ply which were then glued together to make 24 mm frames for the cradle i will need when the hull is turned.
All of the interior painting I propose to do before turning the hull is complete and I can now install the bracing across the hull to add strength for the turning process. There is still half a day of painting to do in the huge aft locker and other Jobs I can do while waiting for timber and a good weather forecast.

Perfect, even idyllic conditions for boat building on Australia Day 2016

The boarding platform includes a 36 mm thick section for fastening the boarding ladder

The last of the feature panels has three coats of clear epoxy.

The 24 mm thick plywood frames that will be part of the cradle for our Didi 40 Cr

Some of the lifting gear waiting to be put into action.

Three extra circuit breakers added to our 12 volt distribution panel.

The tank selection valves to switch between the two 300 liter water tanks.
The high humidity is putting paid to my high hopes of turning the new yacht this month. The forecast for the rest of the week is for a lot more rain and that will not help. During the downpours I have gone shopping and stocked up on epoxy resin and paint. All the timber for the deck has been ordered but it will need dressing and sawing to size. I have bought and added three extra circuit breakers to my switch panel, bought conduit for the cable duct that will go through the refrigerator and bought the bolts needed to secure the engine mounts. In all there are sixteen bolts which will have heads under the engine so I am tack welding them to the mounting frame so that the nuts can be tightened up without getting under the engine. At least the welding can be done under cover from the rain.
I keep finding jobs that are better done now as they will be impossible later. A case in point is the ladder on the boarding platform. The ladder will have to be secured to the platform but once the platform is glued in place there would be no way to add reinforcing behind. So that means deciding on the boarding ladder to use and pre installing the reinforcing. I was reminded how important is this feature when a friend fell overboard from a yacht last weekend and was retelling the tale after sailing on Saturday. He described how hard it was to get back onto the yacht without a ladder. A little unit from Whitworths looks very sturdy and has six fastening screws and should do the job nicely.
Another job that was better done with the hull upside down was the base plate to hold the refrigerator compressor unit. It is not a big job but needed a couple of timber cleats set level. The plan is to screw the compressor to a 12 mm ply base and slide the base into position on the new cleats.
After discussion at the local club I decided to install doors on the two large bottom lockers. There is one in each of the front berth ante room and quarter berth ante room and adding doors will allow us to store heavy items low down. Today I purchased some hinges and latches so if the wet weather continues there is another job I can do.

12 mm plywood webs support the boarding platform on our Didi 40 Cr

Close up of the plywood webs and epoxy fillets prior to three coats of West System epoxy resin

The last 12 mm plywood capping piece on the stern of our Didi 40 Cr

The underside of the 12 mm plywood boarding platform is saturated with three coats of West System epoxy
Only ten days to complete my job list before turning the hull! Top of the list is completing the boarding platform as this provides structural strength to the overhang from the transom. I allowed two days for this task and already it is six days but I have managed to fit in some of the other jobs. Apart from the timber work to support the boarding platform I have put epoxy fillets in the transom to hull join and in the boarding platform to hull join. Then all the new timber needed three coats of West epoxy to water proof the hull. Even the underside of the 12 mm ply boarding platform had to be coated as this area will be inaccessible after completion.
In the march towards turning the hull of our Didi 40 Cr I have a long list of jobs that I would prefer to complete while the hull is still upside down. I have trimmed the excess ply form the gunwhales and double coated ply edge and gunwhale with clear epoxy. It is not the final trim but is enough to provide a smooth edge to assist the rotation of the hull when supported in slings. With the excess ply removed the hull looks more finished hence less is better.

Gunwhales of our Didi 40 Cr trimmed and coated with clear epoxy
As I have progressed with painting the interior there is less dark plywood and more white surfaces and again less dark surfaces is much better. Only the locker and the section that houses the steering quadrant have yet to be painted. These are double and triple coated with clear epoxy so the white two pack primer is more for light than for protection and at a pinch I could leave this area until after the turn.
When I have thought ahead I have masked off areas which will have cleats for the floor and deck. Elsewhere I have painted the surfaces knowing that a quick hit with the high speed angle grinder and coarse sanding pad will prepare the surface for epoxy glue.

Two coats of two pack epoxy primer in the companionway of our Didi 40 Cr brighten up the interior
The keel bolt holes have had their third saturation with clear epoxy. I sealed off the holes from the inside with wooden tapered plugs and filled the holes from above with epoxy. After three thorough drenchings with clear epoxy I am confident that all the end grain in the holes has been filled.

Keel bolt holes of our Didi 40 Cr after three saturations with clear epoxy.
A lot has happened in the two weeks since my last post. We have had some of the family home for Christmas and then on the 27th headed up to Lake Macquarie to help out with the Australian Laser National championships. The regatta was mostly fine with light winds but the rain arrived for the last two days and the weather system developed into an east coast low after the regatta.

Waiting for wind on the finish boat at the Australian Laser National titles on Lake Macquarie
We brought Passion out of Lake Macquarie at the first high tide on the morning after the regatta and made a dash for the safety of our swing mooring at Woolwich in the west harbour. The trip out through the Swansea bar was fairly lumpy but the wind and wave was from straight ahead and the sea state had not yet built up to unmanageable proportions. Once through the heads we turned south, let out two thirds of the furling genoa and headed south. The winds were at the top end of the forecast range and hit 30 knots regularly at which times we made 8.1 knots over the ground. As forecast the breeze abated in the afternoon as we approached Sydney harbour and we made less speed with the full genoa and fifteen to twenty knots of wind.
Much of the trip was in rain so we left the wet genoa on the furler until today when the sun returned and the wind died allowing for a pleasant conversion of Passion back to racing mode.
Wednesday was a sad day for sailors with the loss of a crew member from Amante which was returning from the race to Coffs Harbour. Four of the yachts from Greenwich Flying Squadron sail against Amante in the RANSA winter Wednesday series so the loss of a fellow sailor hits home.
Wednesday was wet and windy even on land and at West Pennant Hills our high rainfall made the evening news. The back yard was flooded and water was flowing under the upturned hull so physical work was impossible. I took the time to order up timber for the deck of the yacht and to play around with the water system. Thursday was still too wet and humid for epoxy painting so I spend a few hours sanding and installing the water inlet pipes for the two fresh water tanks. Much of today was spent on Passion but I managed to install the two settee berth backs. These are specified as 6mm plywood but I increased it to 9mm as the box sections formed with the 6 mm shelves, the 12 mm skin and the 9 mm settee backs forms very strong anchoring for the chainplates.

The 9 mm ply settee backs are now glued to the frames and shelves forming a strong box section to anchor the chainplates.

Another view of the 9 mm ply settee backs that form the box section around the chainplates on our Didi 40 Cr
It is exactly eighteen months since I took the first photo of a few of the frames I had cut out on the garage floor for our Didi 40 Cr. Progress has been steady rather than spectacular and we have had many breaks for travel both within Australia and overseas. There is also time off for sailing Passion on Wednesdays and the Laser on Saturdays and Sundays.
Initially I had an objective of launching the new yacht in time for the Port Stephens Regatta in April 2016 but with the many breaks from building I realised this was not possible. A new target date is to launch in mid August in time for the start of the 2016 twilight racing season in October.
Today was spend sanding previously painted surfaces or preparing clear epoxy coated plywood for more clear epoxy. I did manage to coat a couple of feature panels with clear epoxy but the preparation took longer than anticipated and I need another three hours to complete the white two pack epoxy primer I had planned.
For the record I took a few more photos to remind myself how much has been completed after eighteen months.

The transom is marked up ready for the boarding platform. The widened cockpit of our Wide Stern version shows up well and the top bearing for the rudder stock is already glued in.

The bulkhead on front of the galley will be painted white.

Now three coats of clear epoxy on the mast step bulkhead

Looking into the dinette area from the V berth showing two coats of clear epoxy on the V berth ante room feature panel.
As more white two pack epoxy primer is applied the interior of our Didi 40 Cr is being transformed. Today I completed the priming in the V berth area and commended painting in the the settee area. Before applying the white primer I added a coat of clear epoxy to the mast step bulkhead that will probably be left as a varnished feature panel. In the quarter berth I added a third coat of clear epoxy to the feature panel but after inspecting the finished job with a bright light I found a couple of areas of epoxy bloom in the second coat so I will have to sand these two coats back in a small area for the finish I want. No one else would notice it high up near the underside of the bridge deck across the cockpit but I would know it was there.

Two coats of white two pack epoxy primer on top of clear epoxy in the V berth area

A second coat of clear epoxy on the mast step bulkhead

A third coat of clear epoxy on the quarter berth bulkhead.
Tomorrow I am hoping to get a first coat on all of the settee area, a first coat in the galley area and a second coat on much of the settee area and the chart table.
This is all in preparation for leaving it for a couple of weeks while we help out with the Australian Laser National Championships at Belmont. We transferred Passion to Lake Macquarie yesterday and bumped over the channel with the help of a tow from Lake Macquarie Marine Rescue. On the way out on the 5th of January we will have to find a higher tide. Passion has wings on the keel and we cannot tip her over to reduce the draft. The new boat has 500 mm more draft so Lake Macquarie will not be on the future visit list unless they dredge the channel more.
I have been installing the outer wings of the V berth bunk base as fixed elements glassed to the hull and glued to the outer bunk bearers. This makes the outer elements into a small “U” beam with the outer flange the hull and the inner flange the 22 x 44 mm meranti bearer. The web of the beam is then the 6 mm plywood which will be the outer edge of the bunk. Apart from making a strong beam to resist slamming in the waves it produces a neat shape for the rest of the bunk top. I might hinge the bunk tops as I find the loose plywood top on our Jeanneau SO 37 difficult to hold open and as a result the large space under the bunk is rarely used.
The locker fronts in the V berth ante room are now installed and have their first coat of primer on the faces. Inside the locker the painting is finished except for touch up after the deck is installed. There is still a seat to be installed in the ante room and under the seat will be a sizable locker. I am keeping the cut outs for the lockers in case we find it necessary to put door on some of the cupboards.
There is now acres of boat ready for painting so that means another trip to the store for more paint. There is still acres of epoxy coated plywood to be sanded ready for priming. It is essential to take off most of the gloss to get good adhesion of the two pack epoxy primer. The same goes for any cleats that have to be epoxied to previously epoxy coated surfaces. In most cased I take the plywood back to almost bare wood to ensure the strongest possible bond.

The plywood edges of the bunk tops have been converted into U beams by bonding the plywood to the hull and to the outer bunk bearer.

Shelves and hanging locker fronts in our Didi 40 Cr. The frame face is protected as it will be epoxy coated and varnished as an accent panel in a sea of white.

In between big task I have been putting some finishing touches like rounding some of the furniture edges with the Makita hand router.
Today could have been a bit day of sanding and painting but I wanted to show some progress so I fitted a couple of locker fronts just for the photo opportunity.

Locker fronts on our Didi 40 Cr glued and nailed to the frames and shelves

The front for the hanging locker in the quarter berth ante room of our Didi 40 Cr. Some cable organiser tube is installed behind the lockers.

An accent panel of epoxied and varnished timber is going to be left in the quarter berth and other rooms.
Two coats of Interprotect brighten up the vanity in the head.

Just the end panel on the chart table seat is needed to be fitted before the hull is turned.

One coat of clear epoxy and a coat of Interprotect in the V berth ante room. One more coat of Interprotect and the locker front can be installed.
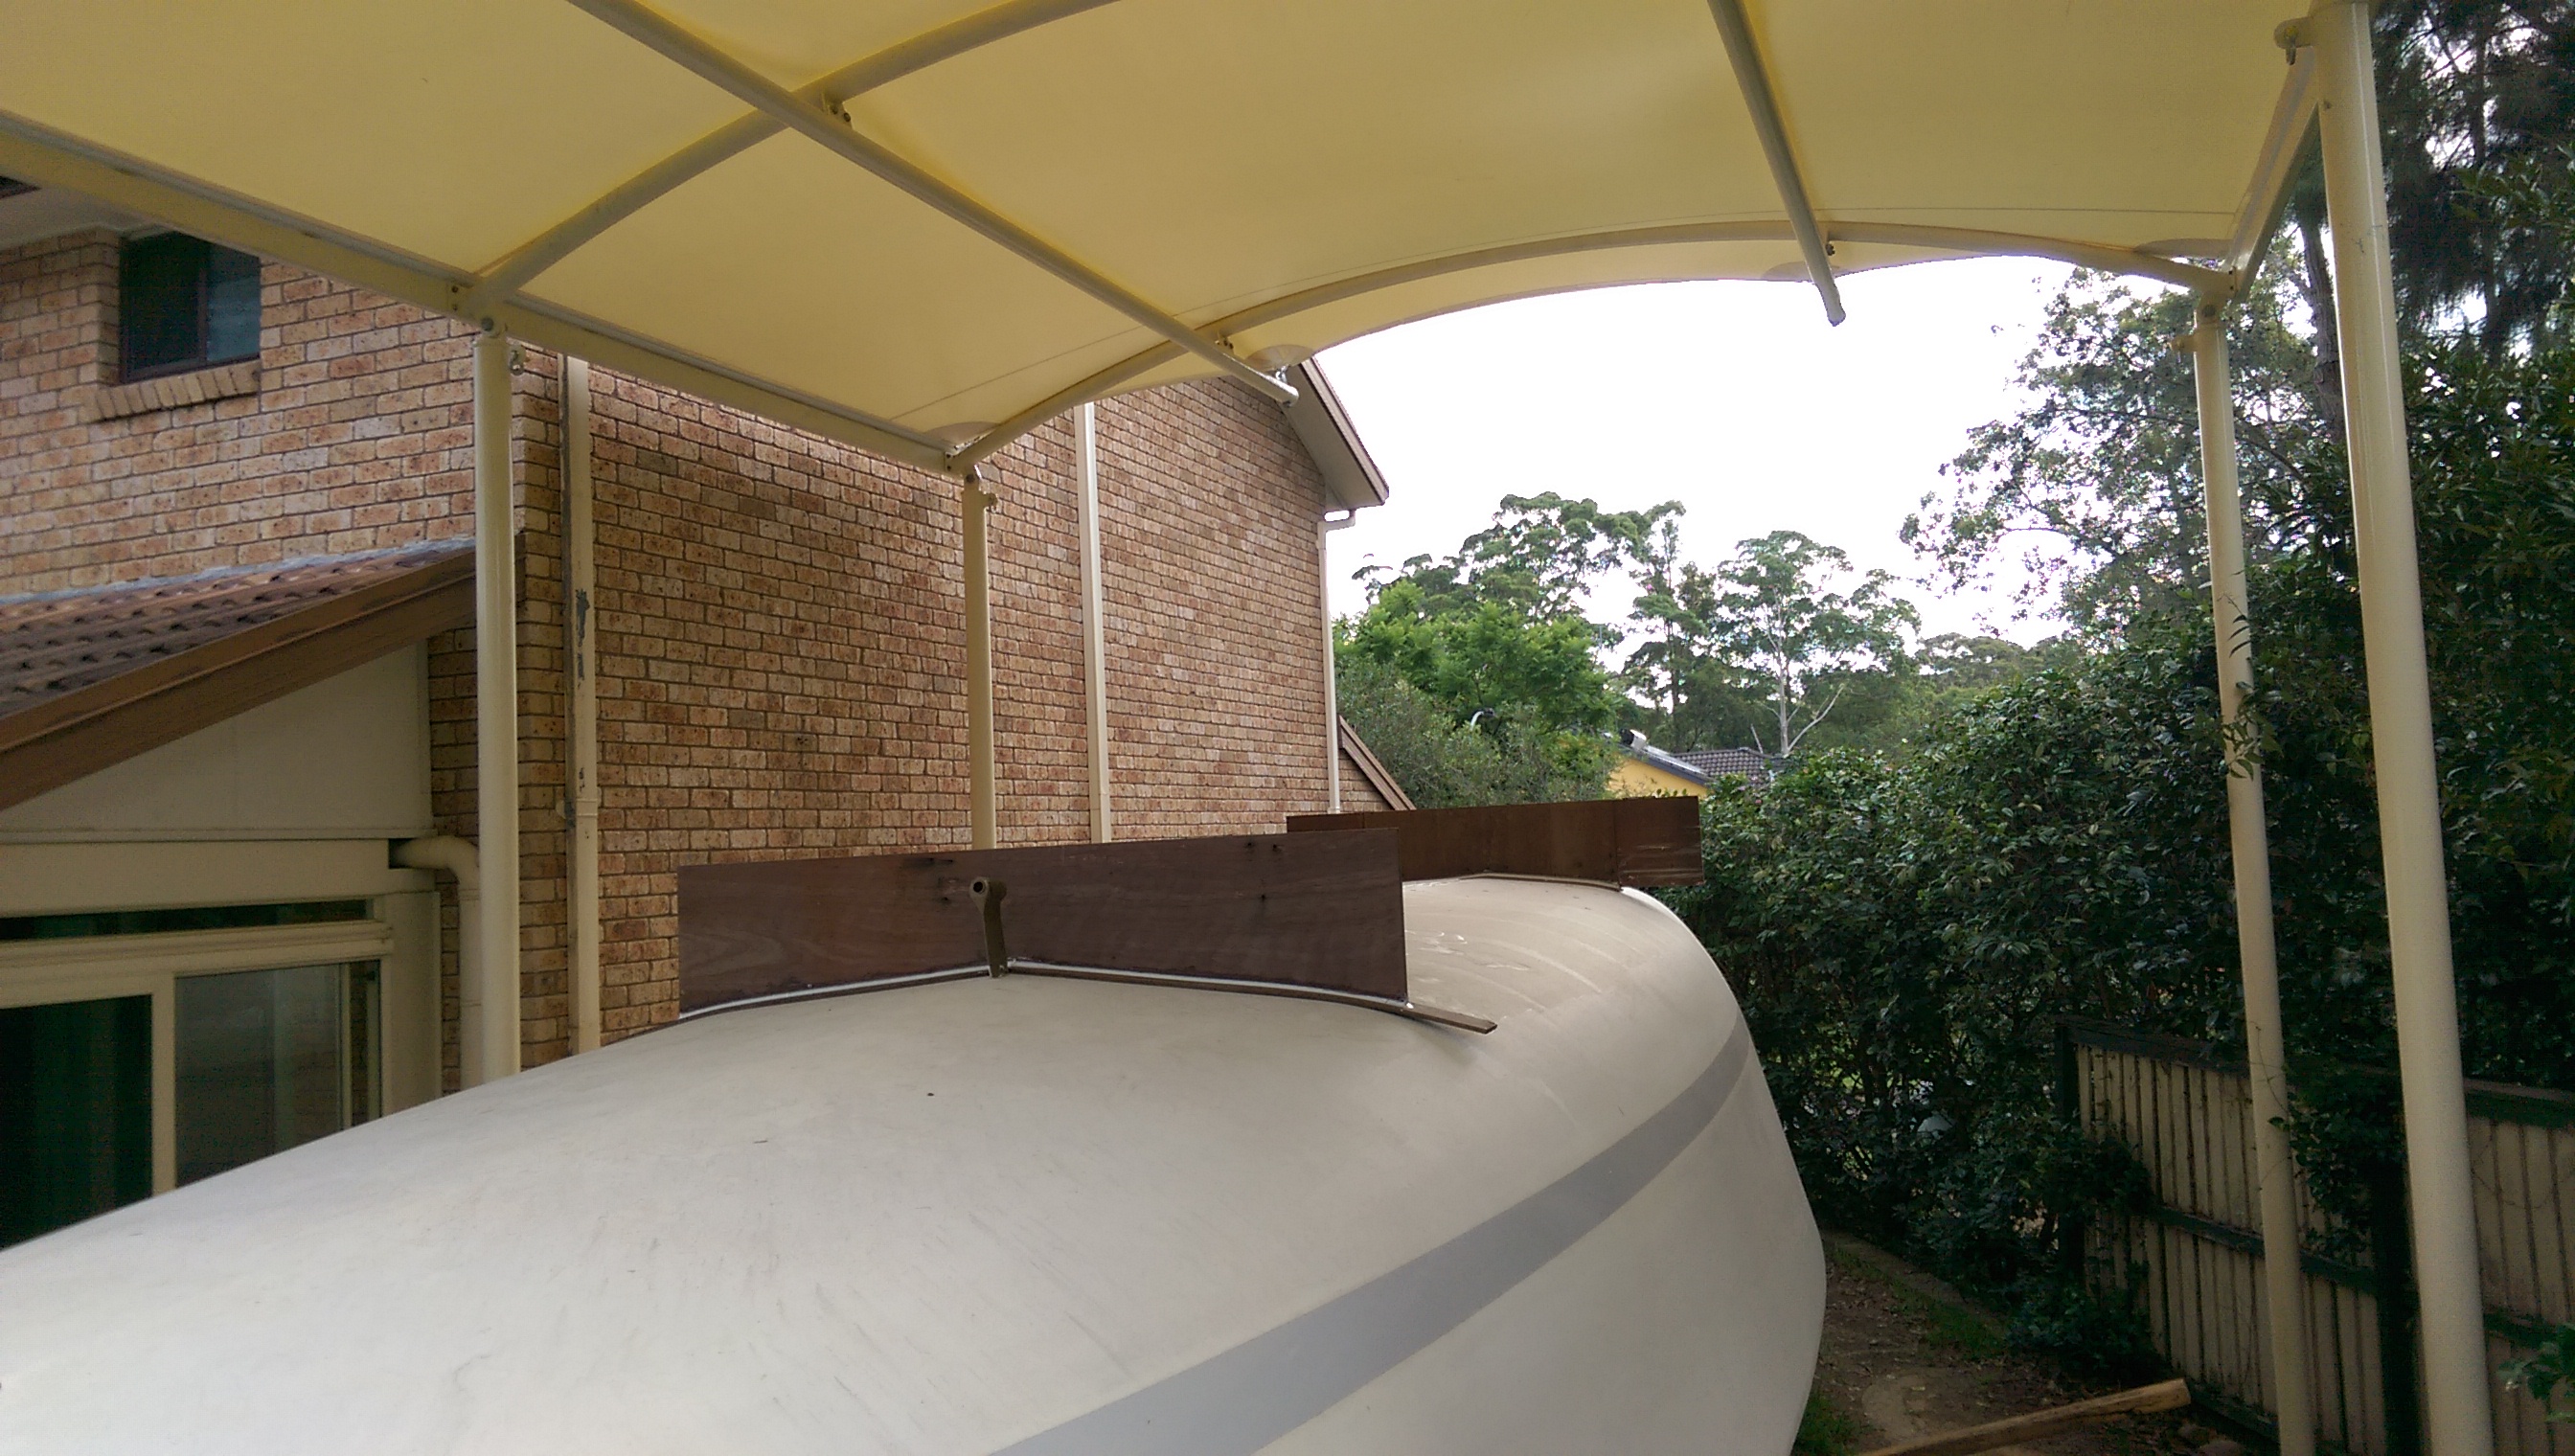
At last the awning is installed and just in time for summer. As soon as the shade material was pulled over the support structure the temperature under the hull dropped and working conditions improved. Once the grout under the supports cures we will be ready to turn the hull. This event will probable be left until after the New Year as I have some other activities planned and the hull is safe and dry while it is upside down.
Today I cut and fitted the three shelves in the front berth ante room. They are grouted to the hull ready to be epoxied to the hull with a couple of layers of 475 gram double bias cloth. Then there are cleats to be glued to the shelf edges and the whole area primed with International Interprotect before fitting the locker front.

Rear view of the awning over our Didi 40 Cr

Front view of the awning over our Didi 40 Cr
The past week have had some very hot conditions so boat building progress has been measured rather than spectacular. In the hot conditions the epoxy resin cures quickly so any work had to be well prepared. Also as I am doing a lot of small jobs I try to have some extra work ready to use any surplus glue. bog or paint. I am at the stage where I want to prime a few panels with International Interprotect and as I use up a disposable roller with each batch I like to have a large area ready to paint.
After a few days of sanding in between jobs I have the head ready to paint with any surplus paint and am a couple of hours of sanding away from having the quarter berth ante room ready. The shell of the vanity unit in the head is completed except for one side panel which I need to leave off until the painting is finished. The top of the vanity and the one shelf are grouted and fibreglassed to the hull and have cleats ready to take the side in due course.
So that I have places to use up extra fillet bog and extra primer I have started preparing the forward berth ante room. I still have to cut our the four shelves and two fronts but the preparation gives me plenty of uses for the spare bog and paint.
In the dim light of approaching evening I set up the laser level to mark the line on the transom for the cleat where the swim platform will be attached. I have agonized about the slope of the platform but in the end accepted Dudley’s plan with it dead level. The other option was to have it follow the slope of the cockpit floor so it would shed water better but I went for the flat option when I realised how much I use the platform to store items I am transferring from the tender.
One job I must not forget to do before installing the locker fronts is to cut access holes for wiring, instruments, gas and plumbing and install cable conduits where needed.

Quarter berth locker fronts ready to paint

Quarter berth ante room seat and locker front before cutting the locker opening.

Top and shelf in the vanity. The tiny shelf at the side is a small seat under which will run cable ducts. I will think about a wider seat higher up the hull once the boat is upright.
The last little frame has been bonded to the hull. this is the small frame under the chart table seat. There are three spacers holding it parallel with the adjacent frame. Another photo is the second last frame and it is the side of the vanity in the head. One spacer has been left in place after the glue has dried to keep it steady. And the third last frame was the side of the hanging locker in the quarter berth ante room. I am just showing the top (bottom if you are right way up) part as the light is too strong to show the rest of it. The photos show a range of construction techniques including using spacers to hold frames level with adjacent frames and timbers clamped to frames to keep the plywood straight until the glue on the frame cures.

The base of the frame that forms the side of the hanging locker in the quarter berth ante room of our Didi 40 Cr. The space on the right has a small seat at the same height as the bunks. The locker needs just the front to be completed.

The last tiny frame on our Didi 40 Cr is one for the seat at the chart table

Just the front and the top needed to finish the base of the vanity in the head of our Didi 40 Cr. There will be a shower seat in the area in the foreground.
I am currently painting the insides of the lockers in the quarter berth prior to installing the locker fronts. At the same time I have painted the rest of the quarter berth area including under the bunks. I am using International Interprotect over clear epoxy which meant sanding the gloss off the clear epoxy before applying the two coats of Interprotect. The round base of the random orbital sander has been effective in sanding the inside of the radius chine but there is still a lot of hand sanding of stringers.
The painting could not proceed until I had glassed the shelves in the locker to the hull. Some shelves are located so close to stringers that I can glass only one side of the shelf to the hull so I am doubling the glass in those cases. Peel ply is proving very effective in holding down the wet edge of the glass and giving a nice smooth transition from bare timber to the glassed area. The extra time taken to cut and apply the peel ply is more than made up by the reduced clean up and sanding time.
The power board and instrument area behind the chart table is getting the same epoxy glass and paint treatment ready for installing the frame for the panel. This meant finishing the chart table upside down.
By my reckoning there are just three frames left to fit. One for the hanging locker in the quarter berth area, one for the side of the vanity in the head and one for the front edge of the seat in the chart area.

At least three coats of epoxy or epoxy paint over all the quarter berth area of our Didi 40 Cr

Paint and progress on the chart table area of our Didi 40 Cr

Shelves glassed to the hull in the galley area of our Didi 40 Cr.
I have been filleting frames to the skin of our Didi 40 Cr and fibreglassing shelves to the skin. These are a messy jobs which once started have to be finished or the batch of glass or bog as the case may be goes hard. In some brief windows of time when I did not want epoxy hands I marked out the profile of the rear of the hull. I looked at a range of options trying to get a few more millimeters of heeled water line length but in the end decided that Dudley’s original sloping profile was the nicest looking, lightest and did not give away much length.
After a few tries that did not look right I finally understood Dudley’s instructions. The ends of the battens that are used to mark the line on the radius chine have to be lined up with the straight lines already marked on the side and bottom. This needs more hands than I have available so it was a case of holding the batten and eyeing off a spot that fell on the line then marking that spot with a pencil and repeating the process until a whole row of spots marked out the cut line. For good measure I clamped two long battens lined up with the lines on the side of the hull. I could sight across the hull and check that all the marked lines on the hull were in line with the two sighting battens. Last I marked out the lines with blue masking tape which could be seen from a distance and did a final check that it looked OK.
Marking completed I got brave and cut off the surplus hull section with a hand saw.
The finished cut line is rather pleasing to the eye. Also an inspection of the lamination cut off from the hull shows no defects so I am pleased with the progress.
While it is a shame to throw away such a nice piece of lamination the plus side is that we get a 1.8 metre wide boarding platform about 45o mm deep which will be great for accessing the yacht from jetty or dinghy and double as a great swim platform. The rudder under the hull instead of hanging off the transom makes this boarding platform possible as well as giving the maximum sailing water line length.

The surplus hull at the stern of our Didi 40 Cr has been trimmed off revealing the nice shape of our wide stern version.

Nice glue lines in the lamination of the radius chine of our Didi 40 Cr

It seems a shame to throw these bits away but we do get a very large very useful boarding platform.